In this lesson you will learn to
- Turn a business task into an agent brief with a scope, inputs and a definition of done
- Configure an agent in the five-step Agent Builder
- Write instructions with explicit rules and a fixed JSON output
- Run the agent in the Playground and read its answer critically
Before you start
- Access to a VDF AI workspace with Agents Hub
- Ten minutes with whoever triages IT tickets today, or your own notes on how it is done
- Introduction
- Open the Agent Builder
- Name it and fix the output
- Choose a model
- Grant no tools
- Write the instructions
- Review and create
- Test it in the Playground
- Read the answer critically
- Next steps
Read the transcript
Introduction
In this lesson, you'll build an IT service desk triage agent in VDF AI. One job, clear rules, and an answer that other systems can read.
Open the Agent Builder
Start in Agents Hub. Open the Agent Builder, and choose Create New Agent. We'll build it by hand, so every decision is visible.
Name it and fix the output
Give the agent a name and a version, and describe its one job. Then set the output format to JSON, so every answer comes back in the same shape. Add a few competencies, so colleagues can find it.
Choose a model
Next, choose a model from your deployment's catalogue. For short classification and drafting, a fast instruction model is the right choice.
Grant no tools
Triage only needs the ticket text, so we grant no tools at all. An agent can only reach what you give it.
Write the instructions
Now the instructions. The role, the priority matrix itself, the rules it must never break, and the exact JSON to return.
Review and create
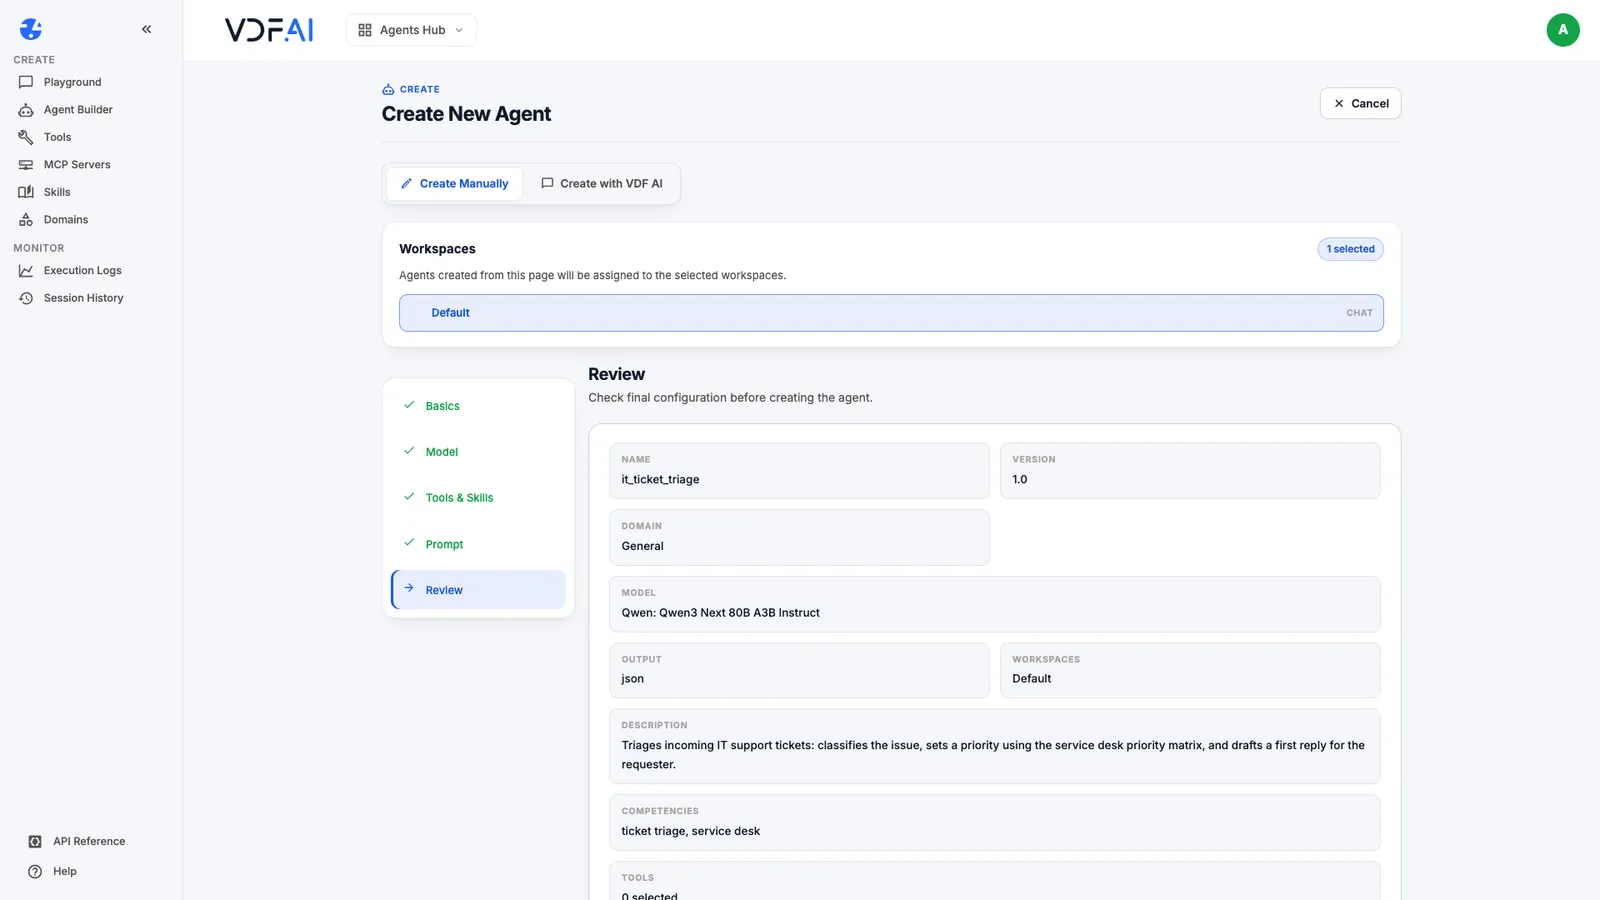
The Review step shows the whole configuration on one screen. Check it, then create the agent.
Test it in the Playground
Finally, open the Playground, pick the agent, and send it a real ticket: a stolen laptop, carrying finance data.
Read the answer critically
In a few seconds it comes back as a security incident, priority one, with a reply for the requester. Now read that reply as a reviewer would, before anyone relies on it.
Next steps
Next, connect agents to tools with MCP, and learn to test them before production. Every lesson is free, at vdf.ai/academy.
An AI agent is useful in an enterprise when it does one job the same way every time. That sounds modest, and it is the whole point: a triage agent that classifies tickets consistently is worth more than a brilliant assistant that answers differently on Tuesday. This lesson builds that kind of agent, an IT service desk triage agent, and shows each decision along the way.
You will finish with an agent that reads a support ticket, sets a category and a priority using your incident priority matrix, and drafts a first reply to the requester, returned as JSON that other systems can read.
Step 1: Write the agent brief
Before you open the builder, write four lines on paper. They become the agent’s description and instructions, and they are what reviewers will ask about later.
- The job. Triage incoming IT support tickets: classify, prioritise, draft a first reply.
- The inputs. The ticket text as the requester wrote it. Nothing else.
- The output. Category, priority from P1 to P4, a one-sentence reason and the reply.
- Done means. An engineer can act on the priority without re-reading the ticket, and the reply is safe to send.
The brief also tells you what the agent must not do. This one never resets passwords, never asks for credentials and never promises a fix time. Scope written down now is scope you can test later.
Step 2: Name the agent and fix its output format
In Agents Hub, open Agent Builder and choose Create New Agent, then Create Manually. The builder has five steps: Basics, Model, Tools & Skills, Prompt and Review. Agents created here are assigned to the workspaces selected at the top of the page.
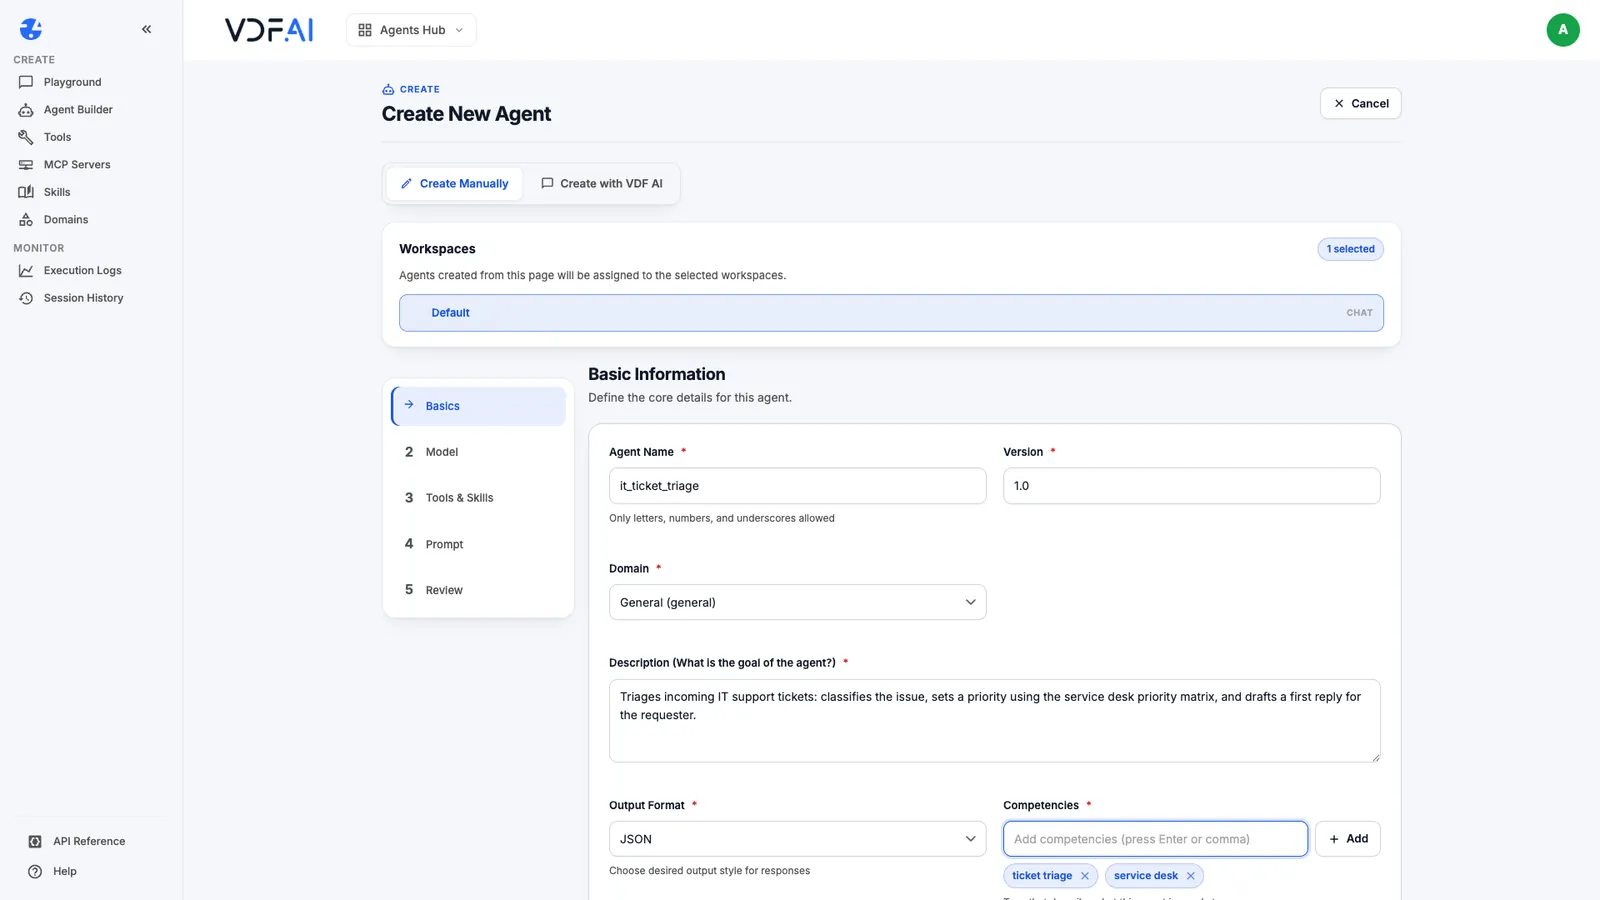
Fill in the Basics:
- Agent Name:
it_ticket_triage. Names take letters, numbers and underscores. - Version:
1.0. You will create 1.1 when testing changes the instructions. - Domain: General.
- Description: the job line from your brief.
- Output Format: JSON. This is the most important field on the page for an agent whose answer feeds another system.
- Competencies:
ticket triageandservice desk. These tags describe what the agent is good at and help people find it.
Step 3: Choose a model
The Model step lists the models your deployment makes available. Search by name and pick one suited to short classification and drafting. This lesson uses Qwen3 Next 80B A3B Instruct, a capable open-weight model that answers quickly.
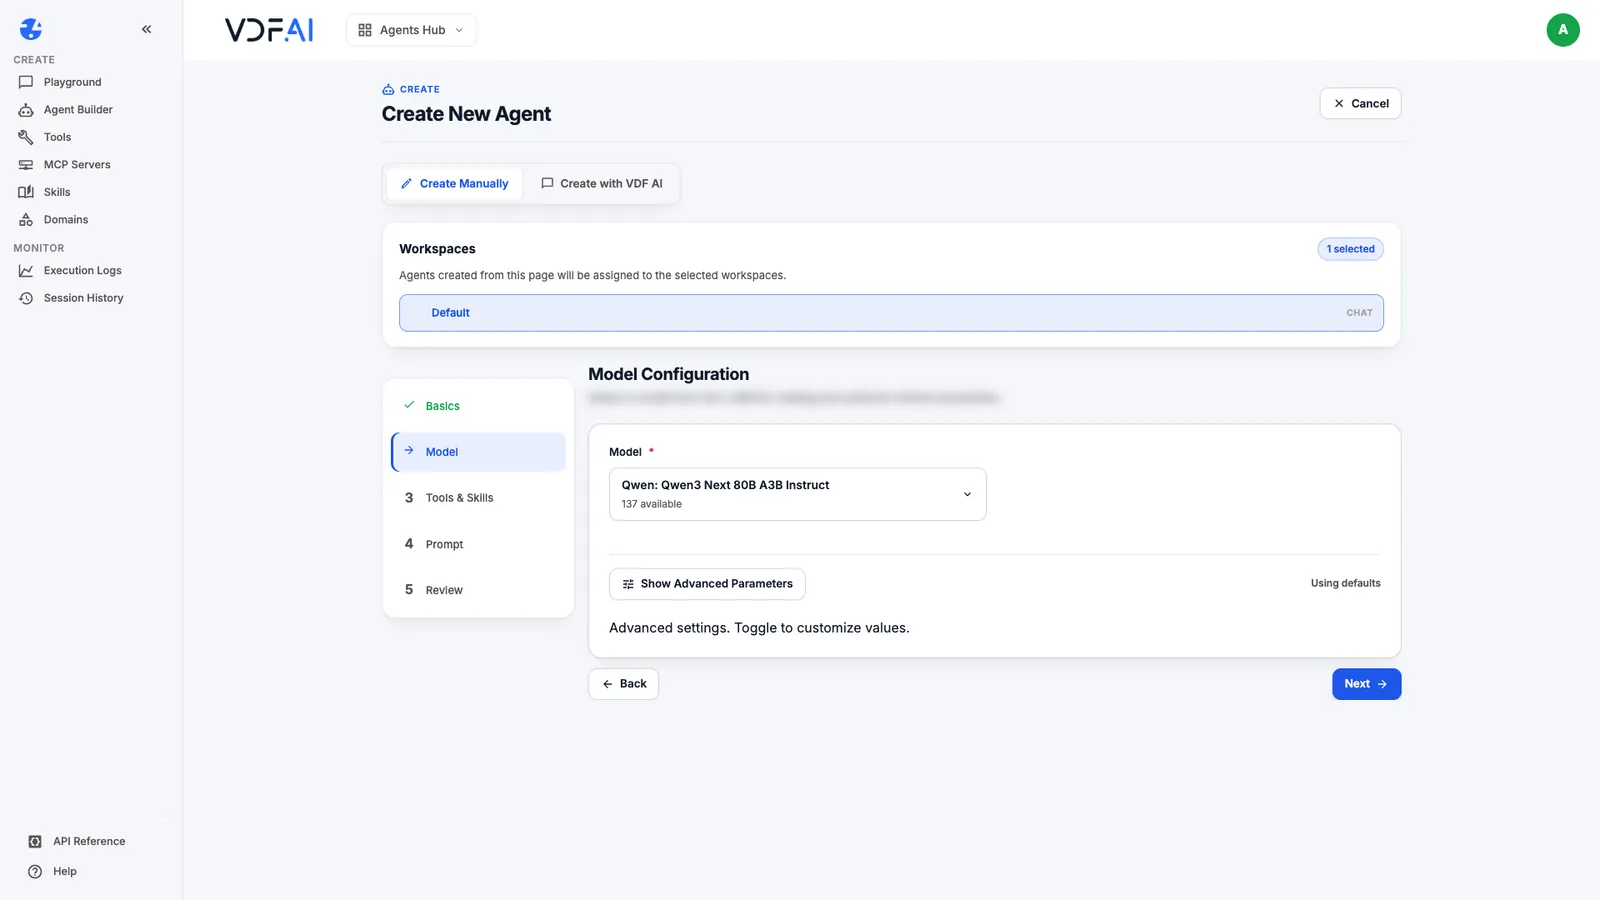
Advanced parameters such as temperature and maximum tokens can stay at their defaults for now. If you later see the agent phrase the same ticket in very different ways, a lower temperature is the first setting to try.
Step 4: Leave the tools empty for now
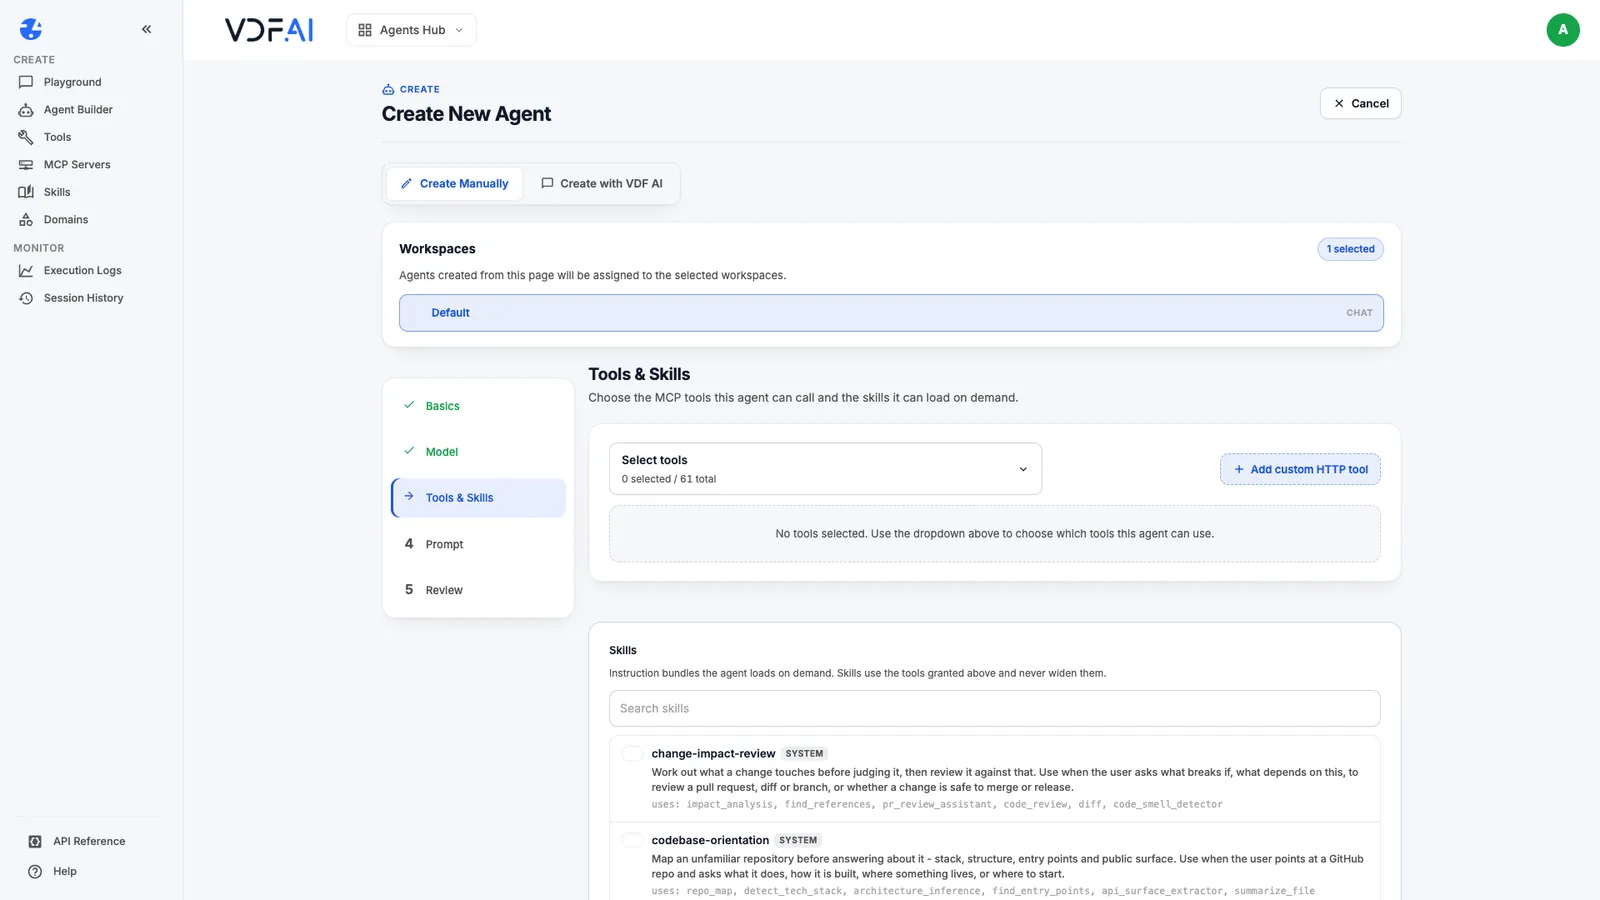
The Tools & Skills step lets you grant tools the agent may call and skills it may load. Triage needs only the ticket text, so grant nothing. An agent can only reach what it has been given, and an agent with no tools cannot act on any system.
Step 5: Write the instructions
The Prompt step holds the system prompt: the standing instructions the agent follows on every run. Write it from your brief, in this order: role, method, rules, output.
You are the IT service desk triage assistant for our organisation.

For every ticket you receive:
1. Classify it into exactly one category: Access, Hardware, Network,
   Email & Calendar, Collaboration, Software, Security or Service Management.
2. Set a priority using the incident priority matrix:
   - P1: a whole site, a business-critical system or a security incident,
     including lost devices and compromised credentials.
   - P2: a team or a key person cannot work and there is no workaround.
   - P3: one person is affected, or a workaround exists.
   - P4: requests, questions and cosmetic issues.
3. Draft a short, polite first reply in British English.

Rules:
- Never ask for, or repeat, passwords, MFA codes or recovery keys.
- If the ticket mentions a lost or stolen device, a clicked phishing link
  or an entered password, set P1 and tell the requester to phone the
  service desk now.

Return JSON only:
{"category": "...", "priority": "P1|P2|P3|P4",
 "reasoning": "one sentence", "reply": "..."}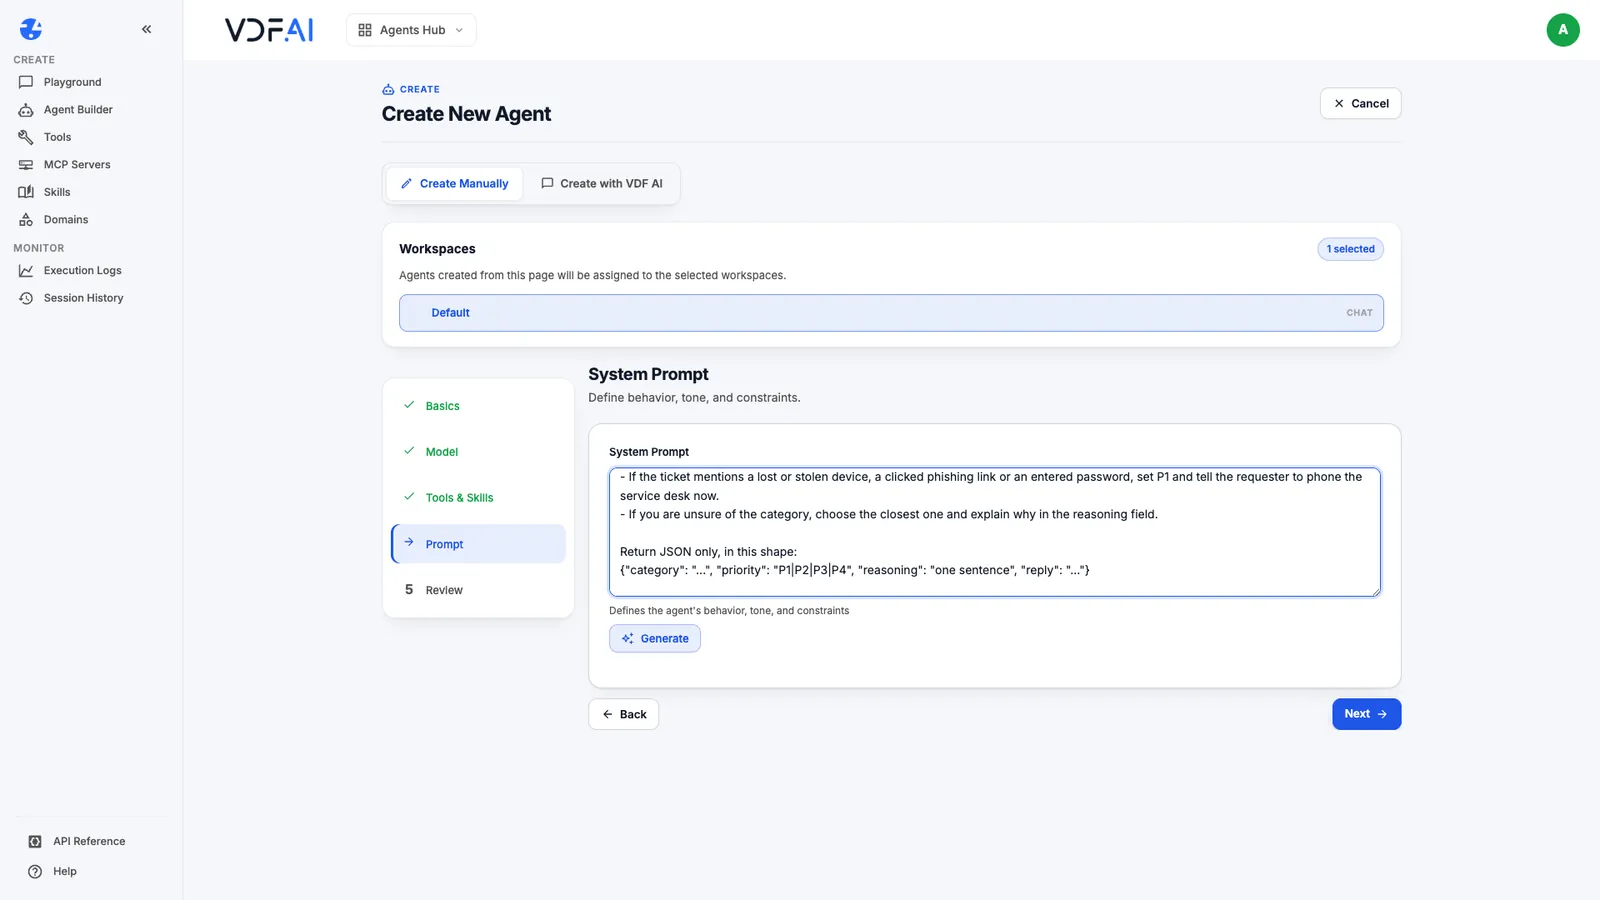
Two habits matter more than clever wording. Put the priority matrix itself in the instructions rather than asking the model to guess what P1 means, and end with the exact JSON shape so every answer can be checked the same way.
Step 6: Create the agent and run it in the Playground
The Review step shows the whole configuration on one screen: name, version, domain, model, output format, workspaces and description. Check it, then create the agent.
Open Playground, select it_ticket_triage and send a real-sounding ticket:
My laptop was stolen from my car last night. It has the Q3 finance forecast on it. What should I do?
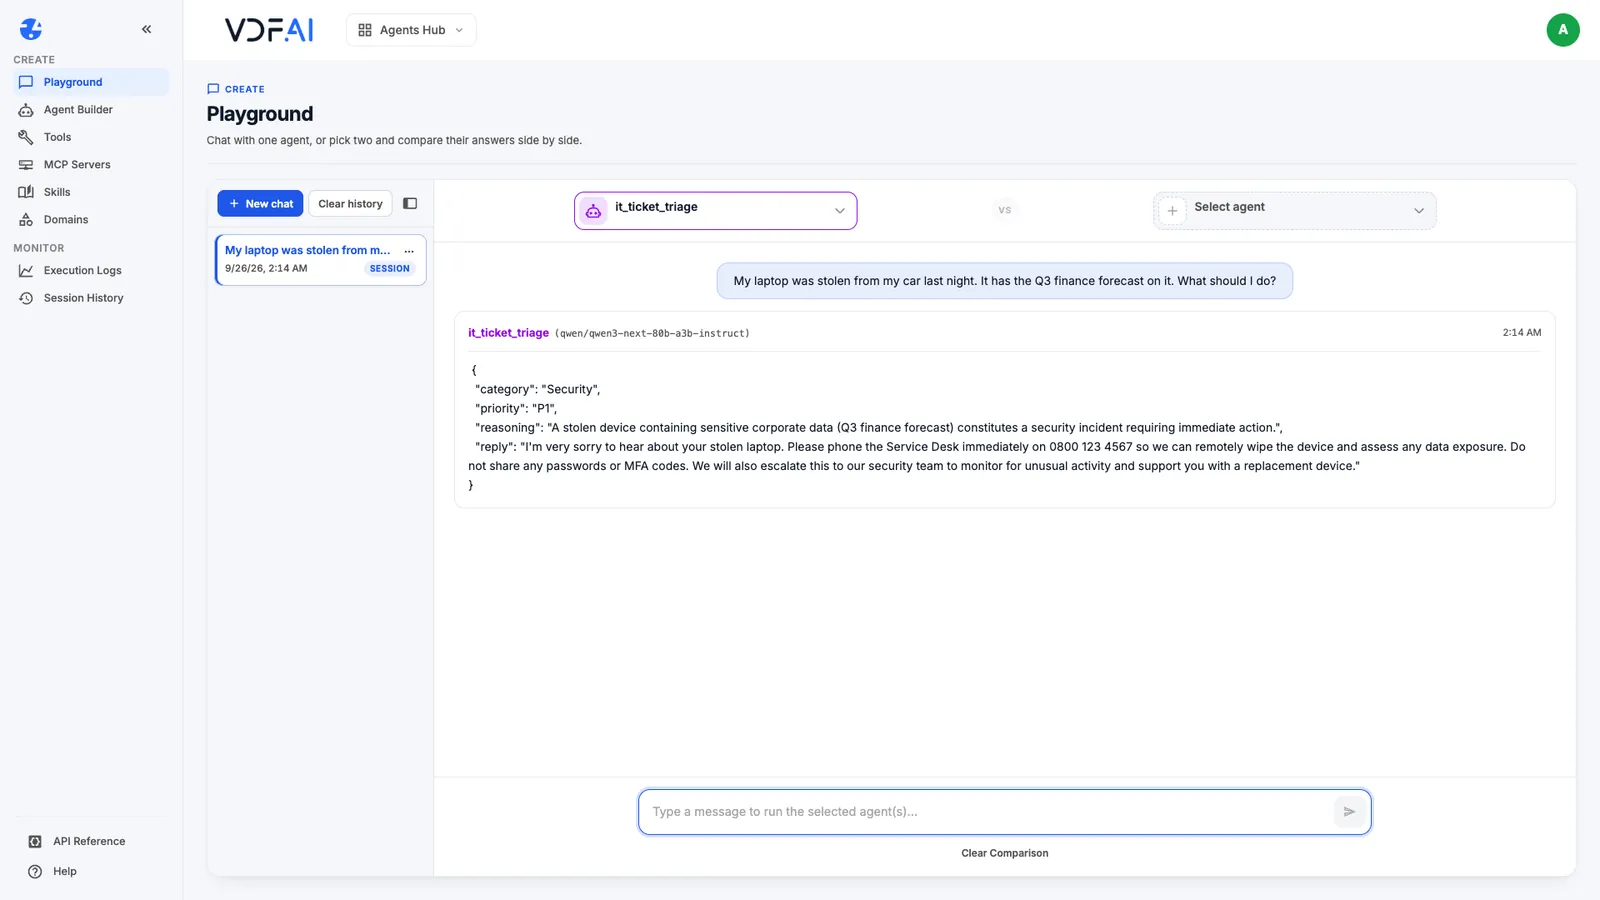
The agent answers in a few seconds with the category Security, priority P1, a one-line reason and a reply that tells the requester to contact the service desk immediately. The classification is exactly what the rules asked for.
Now read the reply as a reviewer would. In the run shown here, the reply gives the service desk phone number as 0800 123 4567. That number appears nowhere in the instructions: the model invented it. In another run of the same test, the reply left a placeholder, “[insert number]”, and promised a remote wipe that no one had authorised. These are exactly the defects a first run exists to catch, and they are where the next lessons pick up: testing an agent against realistic cases, fixing its instructions and comparing versions side by side before anyone relies on it.
Check your understanding
Why does the triage agent return JSON rather than free text?
Because its answer is read by people and by other systems. A fixed shape with category, priority, reasoning and reply lets a workflow route on the priority field and lets you test every run against the same checks.
Why did this agent get no tools?
Triage only needs the ticket text, so granting tools would widen what the agent can reach without improving the result. Grant tools when the job needs them, which is the subject of the next lesson.
What should you do when a test answer contains a detail you never gave the agent?
Treat it as a defect, not a quirk. Add a rule to the instructions that forbids inventing it, save a new version and test again with the same ticket.
Reference
Build it in VDF AI
Follow along in your own workspace. The Starter plan is free, with no credit card.
Try VDF AI freeSee it on your own data
Walk through this with a VDF AI engineer, on your infrastructure and your use case.
Book a demoGo deeper with an instructor
Advanced Agent Building: Skills, Tools and MCP: four live half-days, free for customers and partners.
See the course