In this lesson you will learn to
- Describe a workflow so the planner can build it well
- Read the generated plan and the steps on the canvas
- Turn written rules into a verification step
- Pin models, save a version and read a run step by step
Before you start
- Access to VDF AI Networks
- A task your team repeats, with its rules written down
- Introduction
- Describe the workflow
- Read the plan
- Review the steps
- Pin a model
- Save a version
- Run it
- Read the answer
- Check every step
- Next steps
Read the transcript
Introduction
In this lesson, you'll design an agentic workflow in VDF AI Networks. Describe the steps, review the plan, pin the models, save a version and run it.
Describe the workflow
Open Network Lab. Choose On-the-fly, so every step is built for this task. Then describe the workflow as numbered steps, including the ticket and the rules the reply must follow.
Read the plan
Network Lab turns the description into a plan: four steps, no tool calls, and a check before the reply is finalised.
Review the steps
Each step is a node on the canvas. The rules became a verification step, which checks the draft before the final reply is written.
Pin a model
Open a step to edit it. Under model routing, pin the model, so every run uses the same one while you design and test the workflow.
Save a version
Save the network. Each save records a version, so you always know which design produced which run.
Run it
Now run it with Execute.
Read the answer
All four steps completed in about twenty seconds. The ticket came out as priority three, and the reply promises no fix time and asks for nothing it shouldn't.
Check every step
The Steps tab lists every step with its model and duration, including the verifier, so you can see exactly how the answer was produced.
Next steps
Next, orchestrate several agents in one network, and add a human approval before anything is sent. Every lesson is free, at vdf.ai/academy.
An agentic workflow splits a job into steps that AI agents carry out in order, with a check wherever a mistake would be costly. It suits work that one prompt handles badly: several decisions in sequence, each depending on the last, with rules that must hold every time.
In VDF AI Networks, a workflow is a network: a set of nodes on a canvas, each an agent, a tool call, a check or an approval. This lesson builds one for the service desk. It classifies a ticket, drafts a reply, checks the draft against the desk’s rules and writes the final reply.
Step 1: Write the workflow as numbered steps
Open Network Lab in VDF AI Networks. The Task Input panel takes a plain-language description and turns it into a network. Write it the way you would brief a colleague: the input, then the steps in order, then the rules.
Service desk reply workflow for this ticket: "The printer on the third
floor shows offline for everyone." Step 1: classify the ticket and set a
priority from P1 to P4 using the incident priority matrix. Step 2: draft a
reply to the requester. Step 3: check the draft against our rules: no
invented phone numbers or links, no promised fix times, never ask for
passwords. Step 4: finalise the reply.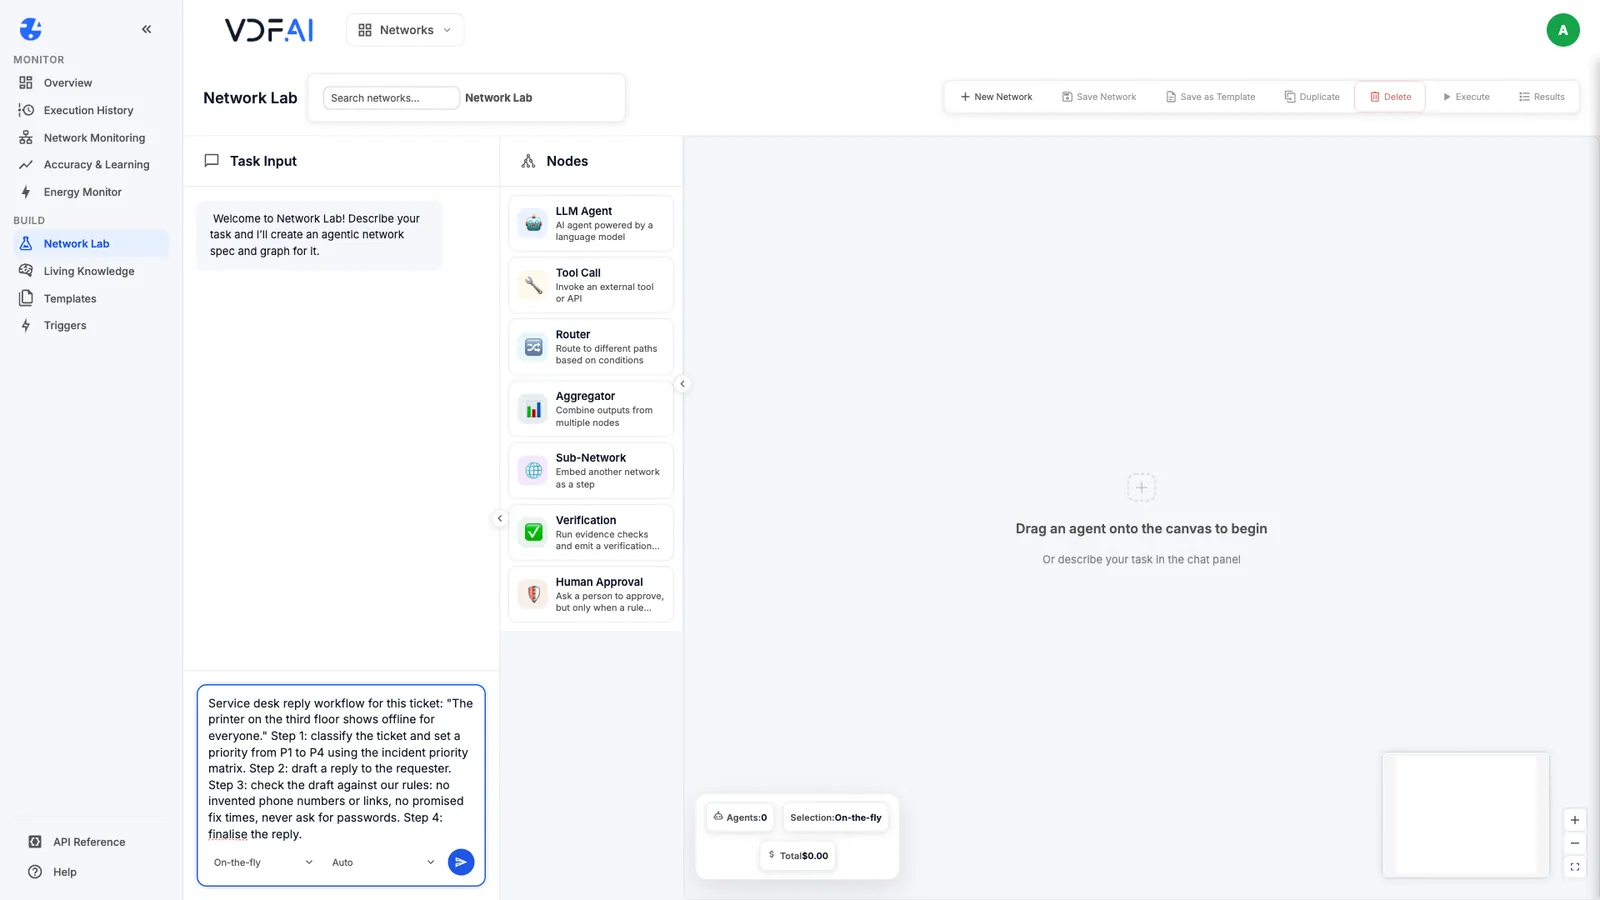
Below the box, two settings shape the plan. Agent selection decides where each step’s agent comes from: Hybrid (the default) reuses agents from Agents Hub where they fit and builds the rest, From Agents Hub uses only existing agents, and On-the-fly builds every agent for this task. Choose On-the-fly for a first design; the next lesson brings in agents from Agents Hub. Plan depth can stay on Auto.
Step 2: Generate the network
Send the description. In our runs the plan arrived in under half a minute, with a summary in the Task Input panel: four nodes and three connections, a Standard plan with no tool calls, and a planner summary explaining each step.
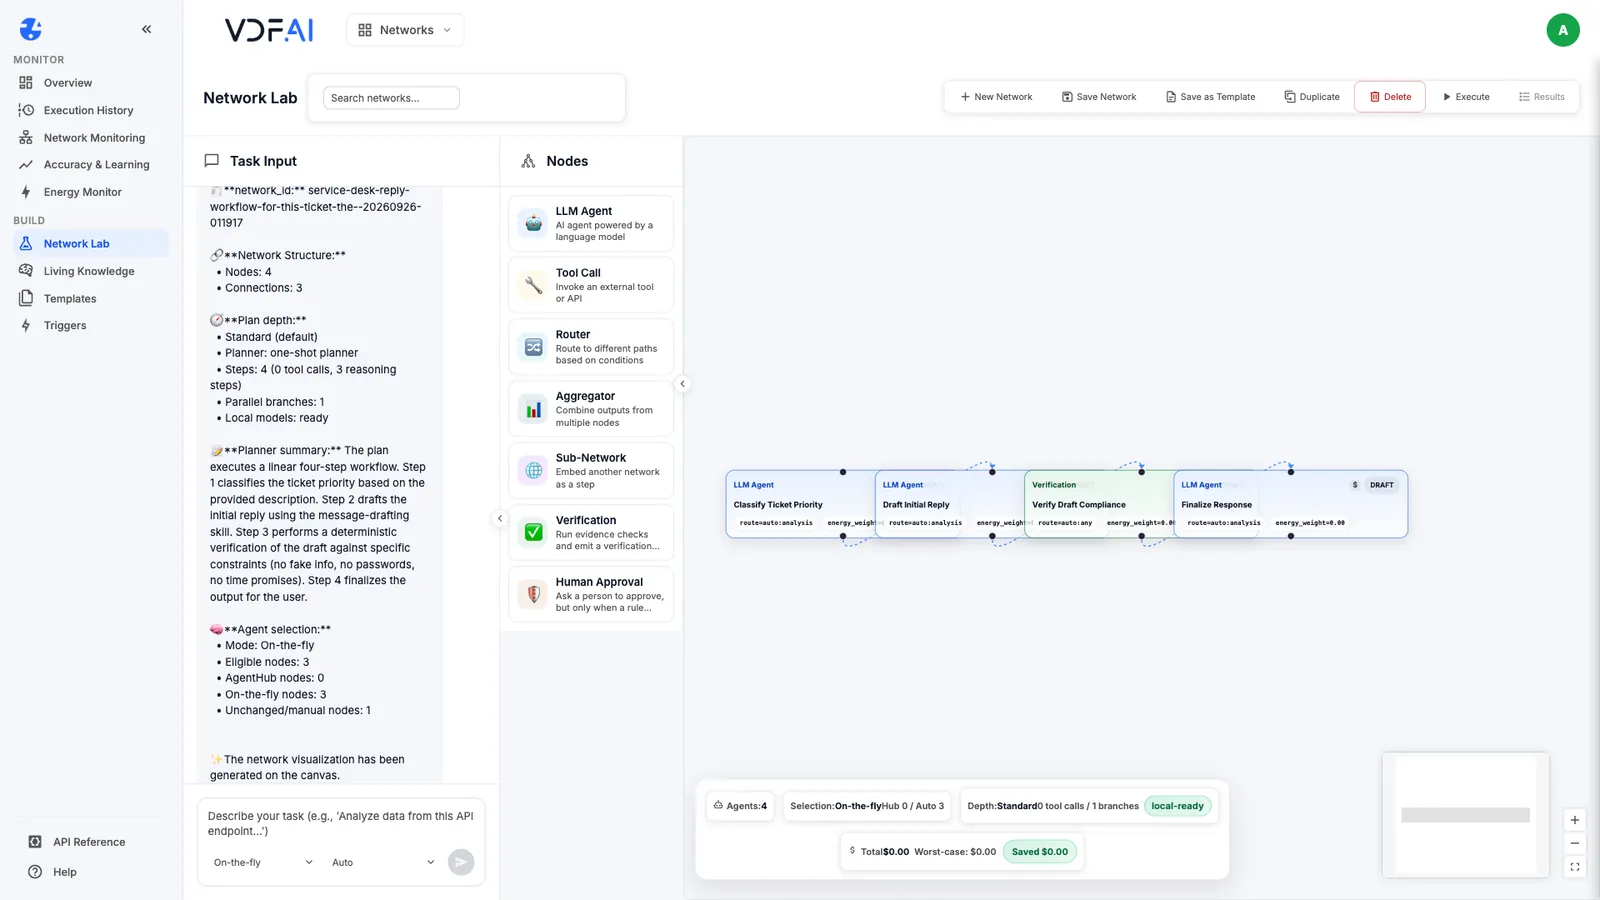
Read the planner summary before anything else. It is the planner’s own account of what it understood, and it is the quickest place to spot a misread instruction. Here it describes the four steps in order and notes that no external tools are needed, because everything the workflow needs is in the ticket.
Step 3: Review the steps on the canvas
The canvas shows the steps as nodes joined in order: Classify Ticket Priority, Draft Initial Reply, Verify Draft Compliance and Finalize Response. Generated cards can overlap; drag them apart so each one is readable, and collapse the node palette for more room.
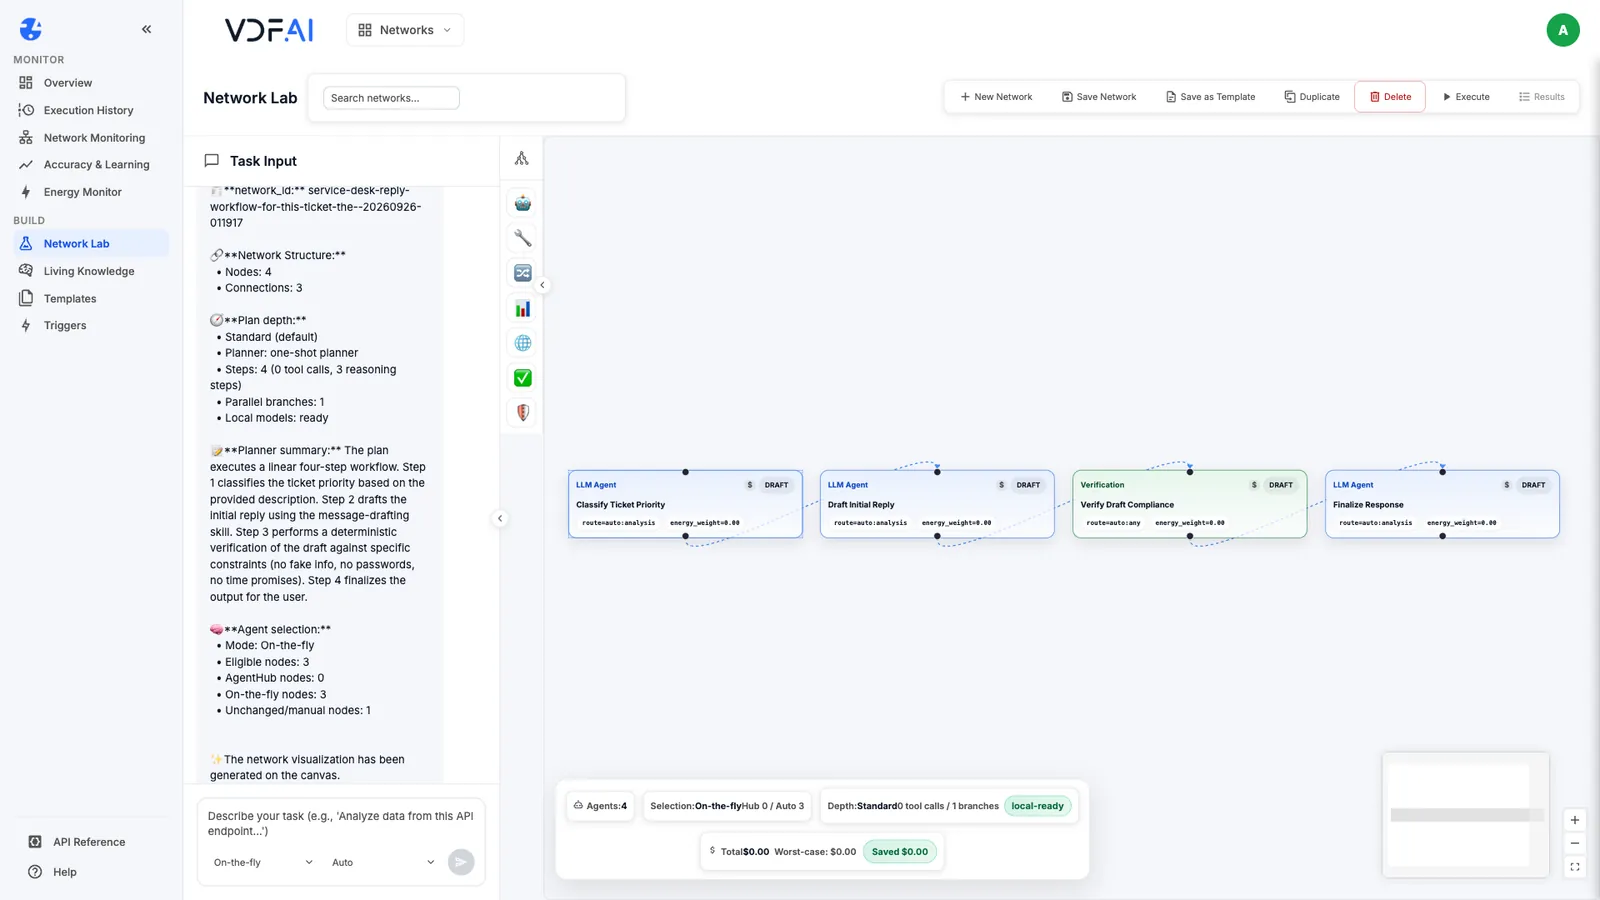
The rules from Step 1 became a node of their own, a Verification step. Open it and choose Edit to see its configuration. In one of our generated networks it held a single check:
{
  "checks": [
    {
      "check_id": "llm_judge_check",
      "kind": "llm_judge",
      "severity": "warning",
      "source_nodes": ["draft_reply"],
      "config": {
        "criteria": "Check the drafted reply against strict service desk rules: no invented phone numbers/links, no promised fix times, and no requests for passwords."
      }
    }
  ],
  "pass_threshold": 1,
  "on_fail": "warn"
}
A verification step can also run evidence_grounding, required_fields, json_schema, regex and tool checks. Its on_fail setting decides what happens when a check fails: warn, halt or repair. The generated default is warn. Change it to halt when a failed check must stop the reply from going out.
Step 4: Pin a model for each step
Select a step and choose Edit. The editor covers the step’s type and source, its agent, its skills, its instructions and, under Model routing, how its model is chosen: Auto, Pinned, Capability, Energy or Regulated.
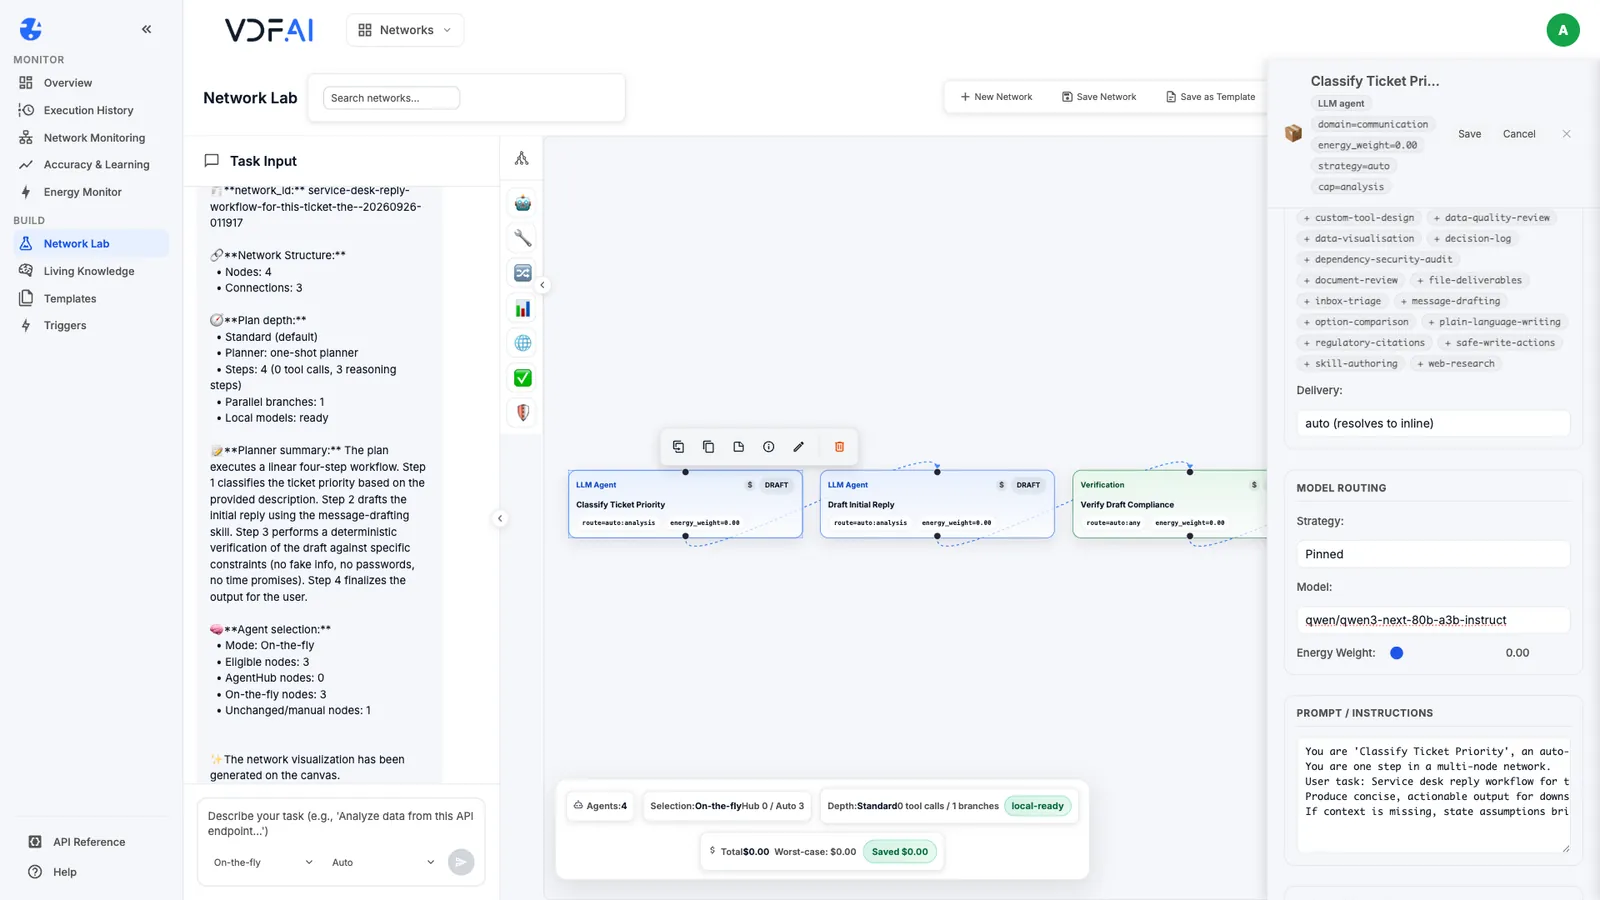
While you design, choose Pinned and enter a model, then Save the step. We pinned all four steps to the same instruction model. With every step pinned, each run uses the same models, so any change in the output comes from a change you made. The routing lesson in this path covers when to unpin and let the platform choose.
Step 5: Save a version
Choose Save Network. Our first save recorded version 1.1, and the cards now show the pinned model on every step.
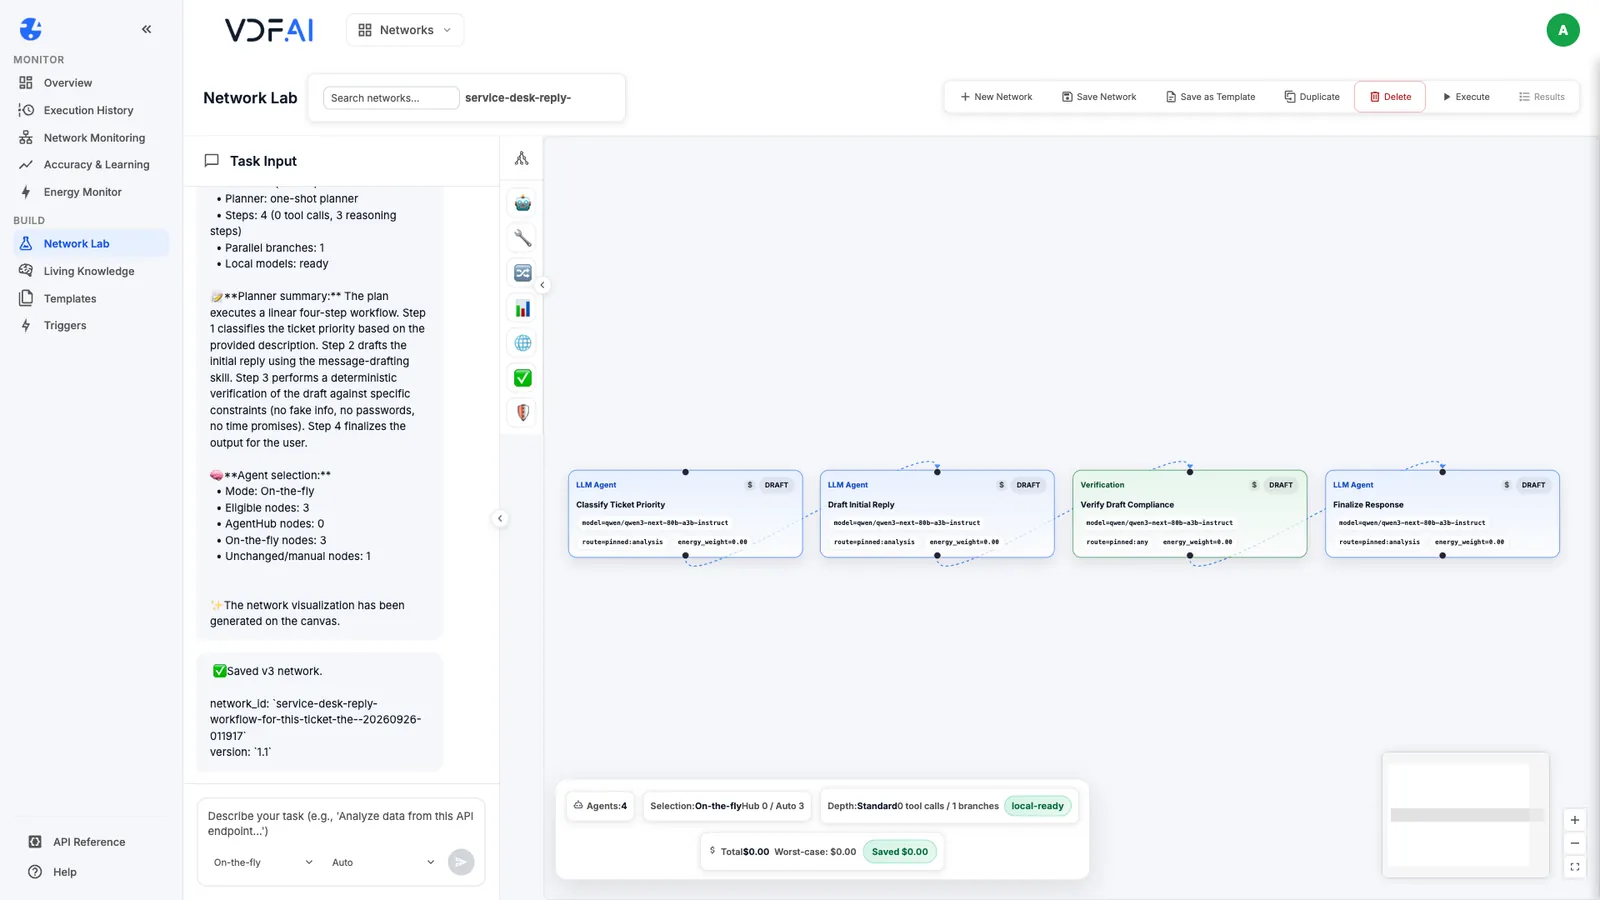
Save after every change you want to keep. A version number on each save means you can always say which design produced which run.
Step 6: Run it and read every step
Choose Execute. The Run results panel opens with the run’s status, duration, step count and the models used, and the Answer tab shows the last step’s output.
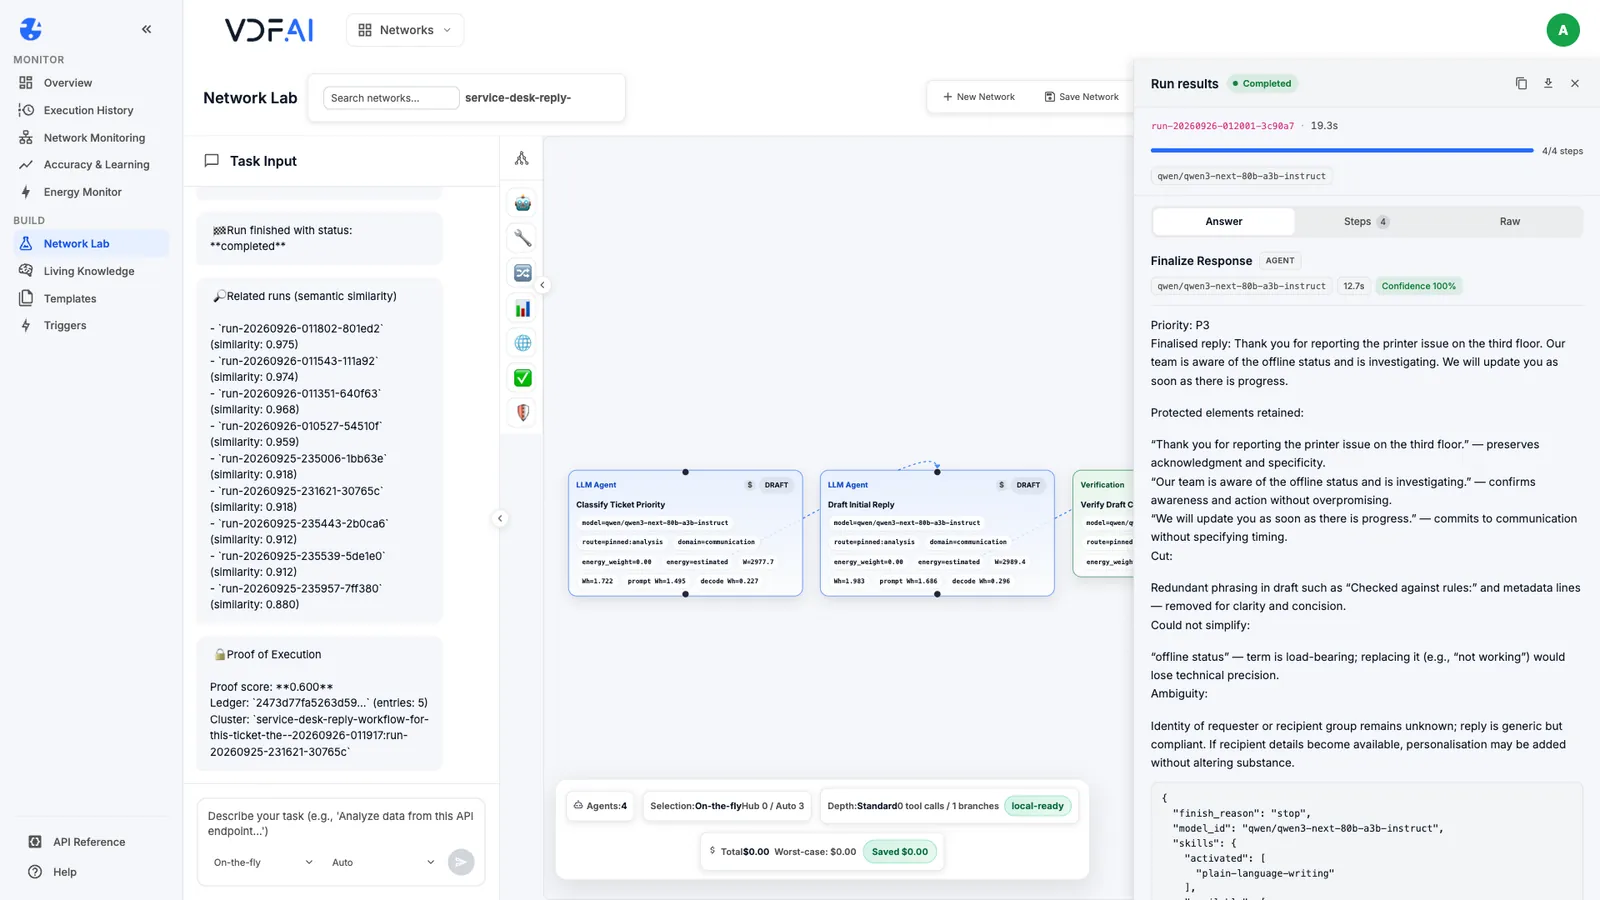
Our run completed all four steps in 19.3 seconds. The ticket came out as P3, and the final reply read: “Thank you for reporting the printer issue on the third floor. Our team is aware of the offline status and is investigating. We will update you as soon as there is progress.” It invents no contact details, promises no fix time and asks for nothing sensitive. Across our three runs of this workflow every reply kept to the rules, while the wording varied from run to run.
Open the Steps tab to see every step that ran, with its type, model and duration. The verifier is listed with the type VERIFIER, separately from the agents.
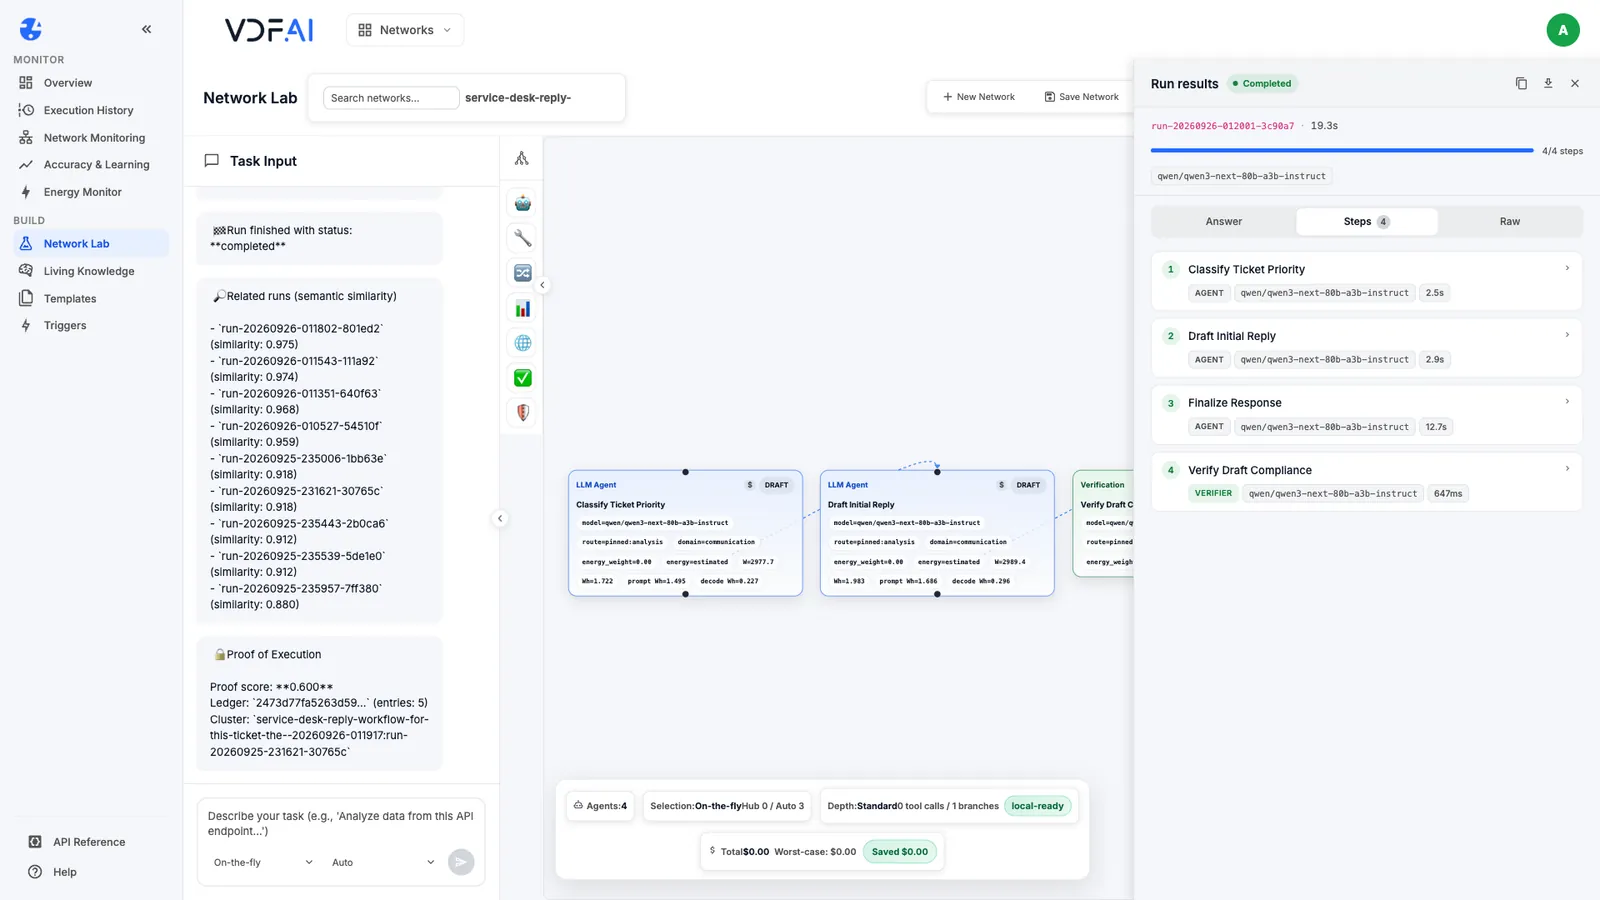
Read each step’s output at least once for every new workflow, not only the answer. A final reply can look right while an earlier step got something wrong, such as the priority, that the next ticket will expose.
Check your understanding
Why write the rules into the task description rather than trust the model to know them?
Because the planner turns them into a step of their own. Here the three rules became a verification step that checks the draft before the reply is finalised.
Why pin models while you design a workflow?
So each run uses the same models, and any change in the output comes from a change you made rather than from routing choosing a different model.
What does the Steps tab show that the answer does not?
Every step that ran, with its type, model and duration, including the verifier, so you can see how the answer was produced.
Reference
Build it in VDF AI
Follow along in your own workspace. The Starter plan is free, with no credit card.
Try VDF AI freeSee it on your own data
Walk through this with a VDF AI engineer, on your infrastructure and your use case.
Book a demoGo deeper with an instructor
Production Agentic Systems: Multi-Agent, RAG and Governance: four live half-days, free for customers and partners.
See the course